

From AI-Generated Clips to Brand-Ready Videos: A Practical Post-Production Workflow
This article explores how to turn AI-generated clips into brand-ready videos using a combination of traditional editing and AI-assisted cleanup. It covers practical ways to remove unwanted watermarks, logos, subtitles, backgrounds, and distracting objects with Remover.work, while highlighting preview checks, quality control, and localization considerations for international markets.

大包子
Author & Contributor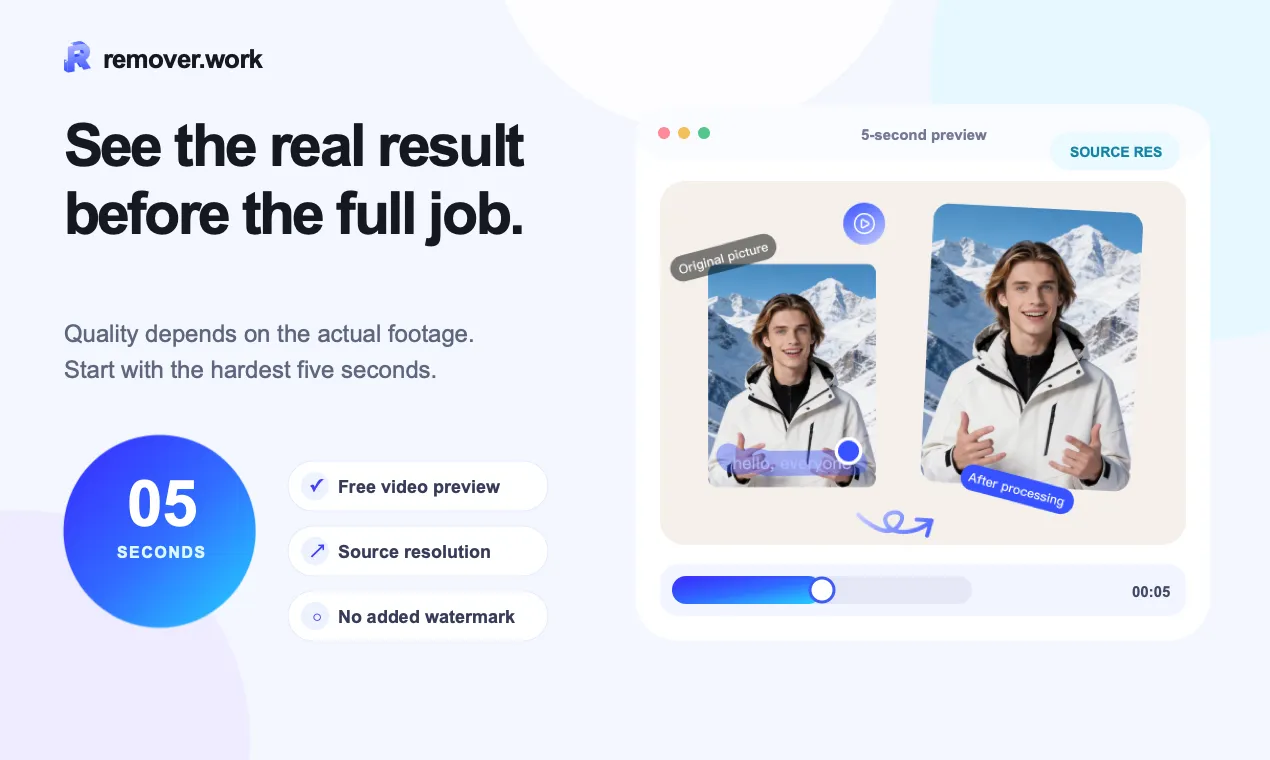
From AI-Generated Clips to Brand-Ready Videos: A Practical Post-Production Workflow
AI video generators have made it much easier to produce short promotional clips, product demonstrations, and social media content. However, generating a video is only the first step. Before using an AI-generated clip in a commercial project, creators often need to deal with unwanted visual elements, inconsistent backgrounds, unnecessary text, or distracting objects.
For cross-border video projects, these problems can become even more noticeable. A video that looks acceptable in its original version may need additional editing before it can be adapted for different platforms, languages, and audiences.
This article explores two approaches to AI video post-production: traditional manual editing and AI-assisted cleanup with Remover.work. It also explains how to evaluate the results and decide which workflow is appropriate for different projects.
1. Why AI-Generated Videos Still Need Post-Production
AI-generated videos are useful for creating visual concepts quickly, but the first output is not always ready for publication.
For example, a creator may generate a product showcase video and discover several issues:
An unwanted logo or watermark appears in the corner.
Text generated inside the video is misspelled or unsuitable for another language.
Background objects distract viewers from the main product.
The background does not match the brand's visual identity.
Some scenes contain unnecessary objects that make the composition look cluttered.
These problems do not necessarily mean the entire video needs to be generated again. In many cases, it is more practical to preserve the usable footage and clean up specific elements during post-production.
The challenge is choosing a method that maintains visual consistency without introducing additional editing problems.
2. Traditional Editing Methods: What Works and What Doesn't
Before using AI-assisted tools, video editors generally rely on several familiar techniques.
Finding the original source file
If an AI platform provides an original export without unwanted branding, downloading that version is usually the simplest solution. However, the original project file or clean export may not always be available.
Cropping or covering unwanted elements
Cropping can remove a logo near the edge of a frame. Editors can also place a graphic element over an unwanted area.
The limitation is that cropping changes the composition, while covering an object may look unnatural when the camera moves.
Frame-by-frame editing
For objects that move across the screen, editors may need to adjust masks or overlays throughout the footage. This provides more control but can become time-consuming.
Rebuilding text and subtitles
When generated text is incorrect, editors can cover the original text and add new subtitles or graphic elements. This is particularly useful for localization, although the background behind the original text may require additional cleanup.
Replacing the background
Background replacement can help create a consistent visual style across different scenes. However, it may require careful subject selection, edge refinement, and color adjustment.
Traditional methods remain valuable when precise control is required. The main disadvantage is that they often involve several separate editing operations.
3. Using Remover.work for AI-Assisted Video Cleanup
For projects that require multiple types of visual cleanup, I would consider using Remover.work as part of the post-production workflow.
Rather than treating every editing problem as a reason to regenerate the entire video, the idea is to identify the unwanted element and select a suitable cleanup function.
Depending on the issue, the relevant tools may include:
Video Watermark Remover: for removing unwanted watermarks from eligible footage.
Logo Remover: for cleaning up unwanted logo elements.
Video Subtitle Remover: for removing existing subtitles before adding localized text.
Video Background Remover: for separating the subject from its original background.
Prompt-based Object Remover: for targeting unnecessary objects through text instructions.
Image Background Remover: for preparing product images or other visual assets used in the editing process.
The important point is to choose the tool according to the actual problem. Removing subtitles, cleaning a logo, and replacing a background are different tasks, so they should not automatically be treated as one operation.
4. A Practical Workflow for Editing AI-Generated Videos
The following is an illustrative workflow for a creator preparing AI-generated promotional footage for international audiences.
Step 1: Review the original video
Before uploading anything, watch the entire clip and identify which parts are already usable.
Make a simple list of the problems:
Unwanted logos or watermarks
Incorrect generated text
Existing subtitles
Distracting objects
Background elements that do not fit the project
It is also useful to identify which elements should remain. For example, a brand logo intentionally included in the video should not be removed simply because the footage contains a logo.
Step 2: Choose the appropriate cleanup function
Open Remover.work and select the tool that matches the issue.
If the problem is a watermark, start with the video watermark removal function. If the footage contains subtitles that need to be replaced with Japanese or Korean translations, consider the subtitle removal tool.
For distracting objects, use the object removal option where appropriate. If the entire background needs to change, evaluate the background removal function instead.
Step 3: Upload a suitable source file
Prepare the original video rather than a heavily compressed copy whenever possible.
After uploading, check whether the selected tool recognizes the footage and whether the unwanted element is suitable for removal.
For moving objects or logos, pay attention to their position across different frames. A cleanup result that looks good in one frame may not remain consistent throughout the clip.
Step 4: Preview the result before processing the full video
One useful part of the workflow is its free preview of the first five seconds at the original resolution, without an additional watermark.
This provides an opportunity to inspect the initial result before deciding whether to process the complete video. However, a five-second preview cannot guarantee that the rest of the footage will produce equally good results.
For longer videos, I would check whether the unwanted element changes position, overlaps with the main subject, or appears during camera movement before proceeding.
Step 5: Inspect the cleaned footage
After processing, review the video rather than judging it from a single still frame.
Pay particular attention to:
Blurred or distorted areas where objects were removed
Residual shadows around logos or text
Changes in background texture
Flickering or inconsistent details between frames
Unwanted changes to the main subject
If the cleanup affects an important product detail or a person's appearance, additional manual editing may be necessary.
Step 6: Prepare the video for its target market
Once the visual cleanup is complete, continue with the localization process.
For example, a video intended for Japanese, Korean, and French audiences may require separate subtitles, voiceovers, or graphic layouts.
Removing old subtitles is only one part of localization. New translations should be checked independently for accuracy, readability, timing, and cultural suitability.
5. Scenario Example: Preparing an AI Product Video for Three Markets
Imagine a freelance video editor receives an AI-generated product demonstration clip from a small international brand.
The company wants to publish versions for Japan, South Korea, and France. The original video contains an unwanted watermark, several English text elements, and distracting objects in the background.
A possible workflow would look like this:
StageEditing taskObjectiveInitial reviewIdentify unwanted elementsAvoid unnecessary processingWatermark cleanupUse a suitable removal toolPrepare cleaner footageText cleanupRemove existing text where appropriateMake room for localized graphicsObject cleanupTarget distracting visual elementsImprove the compositionLocalizationAdd translated subtitles and voiceoversAdapt the video for each marketQuality controlReview all versionsCheck consistency and readability
This is an illustrative workflow, not a report of a completed client project. Its purpose is to show how different cleanup tasks can fit into a practical production process.
It is also important to remember that removing an unwanted visual element does not automatically make a video suitable for commercial use. Creators should check the licensing terms of the source footage and AI generation platform, as well as any applicable rights associated with the content.
6. Is AI-Assisted Cleanup More Efficient Than Manual Editing?
The answer depends on the footage and the type of correction required.
AI-assisted tools can be useful when the task involves removing relatively clear visual elements without rebuilding the entire scene. They may also reduce the need to repeat similar manual operations across multiple assets.
However, they are not a replacement for professional editing in every situation.
For example:
A static logo in a relatively simple background may be easier to handle than a logo moving across a detailed scene.
A subtitle over a plain wall may be easier to remove than text covering a person's face or a complex product surface.
A background with a clearly separated subject may be easier to process than footage containing motion blur or overlapping objects.
This tool offers a free preview of the first five seconds at the original resolution without an additional watermark. Full-video processing requires credits, so it makes sense to inspect the preview before committing to a complete task.
For occasional projects, this preview can help determine whether a tool is suitable for the footage. For frequent production work, creators should also consider how often they need each function and whether the available credit system fits their workflow.
7. Final Quality-Control Checklist
Before exporting an AI-generated video for commercial or international use, I recommend checking the following:
The unwanted watermark or logo has been addressed.
Existing subtitles and generated text have been reviewed.
Removed objects do not leave obvious visual artifacts.
Background changes do not affect the main subject.
No flickering or inconsistent details appear between frames.
New subtitles are accurate and readable.
Voiceover and subtitle timing are synchronized.
The exported video meets the target platform's format requirements.
The source footage and generated assets are cleared for the intended use.
Conclusion
AI-generated video production does not end when the generation process is complete. Cleanup, localization, and quality control are still important steps before footage becomes suitable for a brand campaign or social media publication.
Traditional editing remains useful for detailed corrections, while AI-assisted tools can provide another option for handling specific visual problems. The most practical approach is not to use automation for everything, but to identify which parts of the footage need correction and choose the appropriate method.
For creators who regularly work with AI-generated footage, [ANCHOR TEXT] on Remover.work may be worth exploring as part of a broader post-production workflow.
Tool link: [LANDING PAGE URL]